Category: Category 1

“Leap of Faith” Dreamcatcher for Finnabair

One of my favourites from the amazing selection of gorgeous Prima-Finnabair products is definitely resist canvas. It gives such exciting opportunities to play with. So, I decided to use it today for the background in making a beautiful soft vintage Dreamcatcher. I dressed it into gorgeous combination of blue and gold-brown colors. I love making Dreamcatchers lately. I love the idea of letting yourself go, dream big and being excited for your Dreams to come true.  

There is also a video tutorial on my youtube channel so you can see how I created this piece and maybe follow along some steps.

I hope you liked my inspiration and it gives you some fresh ideas for your creative hours.

Thank you for stopping by and have a lovely day!
Hugs, Aleksandra

“Believe in Yourself” mixed media canvas for Dusty Attic

Hello hello my dear crafty friends. I’m back again with you here on the blog sharing some fresh summerish inspiration with amazing Dusty Attic chipies, inspired by the gorgeous summer Moodboard here on the Dusty Attic blog. I adore previous month’s colors! They are perfect to me with these soft pastel vibes. My mind immediatelly traveled to breathtaking peacock feathers chipies in Dusty Attic store and I decided to do something with it. I arranged it in the middle of the composition with various other stunning chipboard pieces, some Mitform castings embellishments and some beautiful Prima flowers. Of course I couldn’t go without tons of my favourite Finnabair supplies. I hope you’ll like the outcome as much as I do.

First I covered my canvas with a coat of clear gesso and applied some texture paste through a stencil. After the texture paste was dry I added some colors using Pastel Finnabair Impasto paint and some coordinating pastel Finnabair Mica powders. I did some stamping on top. I colored my chipboard pieces with same Finnabair Impasto paints and added some highlights with coordinating Lindy’s gang sprays and squirts. When chipboards were dry I dry-brushed them with some white gesso and the beautiful Heart piece I also embossed partialy with Lindy’s embossing powder. The light bulb chipboard piece is colored with Finnabair metalic gold wax. I arranged everything into composition, added some delicate Prima flowers and some beautiful Mitform castings pieces. For the finishing touch I added some art pebbles, some gold glass glitter and some white glitter. I also added few splashes with diluted with acrylic paint on top. 
Here are some closeup photos for you:

The Dusty Attic chipboards I used for my project are:

Swirly frame,

Floral Frame Set #2,

Peacock Feather,

Entangled Heart,

Industrial Globes #3.

Thank your for taking time and stopping by. I realy appreciate it! I hope I brought you some inspiration today with my project. I’ll see you again soon! Until then… enjoy your days!

Hugs, Aleksandra

Find Joy in the ordinary day and open doors to new adventures

I hope you are spending your first September days as lovely as possible. With the start of September here in Slovenia school also started after two months long summer vacations. My three kiddos went back to 5th, 3rd and 2nd grade of 9 year long elementary school. It’s been a busy and quite stressfull week as we are all trying to again get used of all the morning and daily routins and obligations that come with it. 
But as always there is some excitement in the air as they are stepping on a new journey, opening some new doors in their lives. I tried to encourage them and offer them some advices as mothers usually do and of the most important ones was to embrace the journey and to rejoice over the small things that happen to them on this journey. So this was also my inspiration for today’s post with gorgeous 49 and Market products.

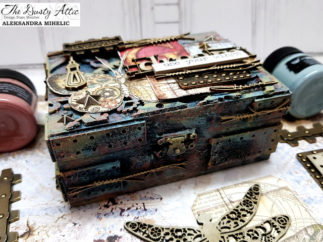
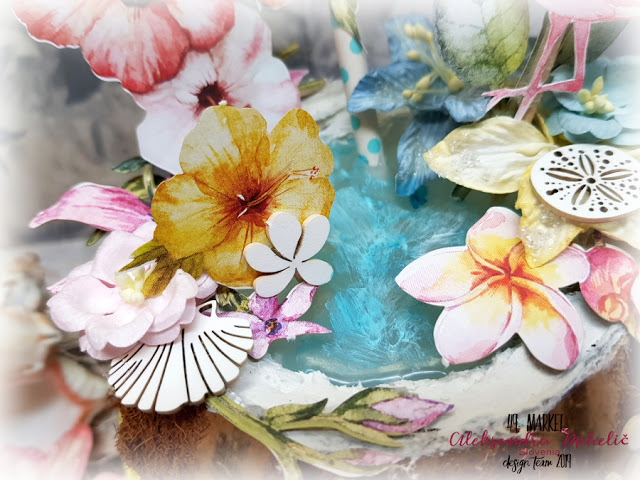
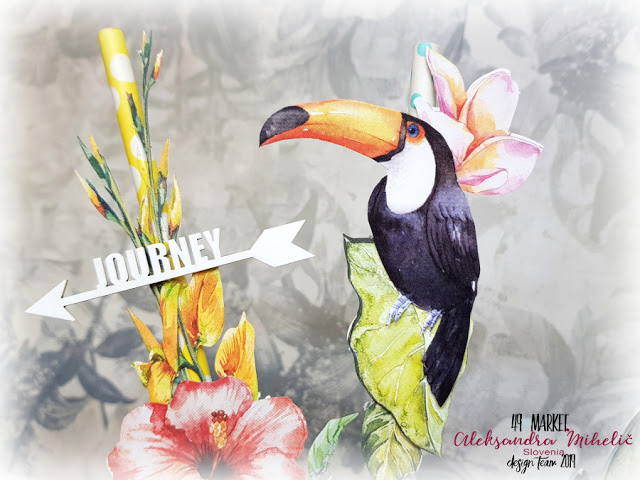
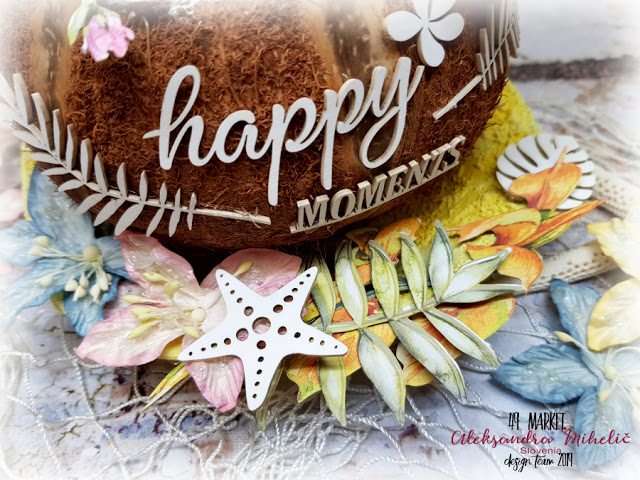
I used the background from Serendipitous collection, paper called “After the rain”. I added some white crackle texture paste through my stencil with a crackle pattern. I then added a photo of a door, which I got from an online free stock photo platform. I created a composition arround my photo using lots of laser cut “Serendipitous” embellishments, 49 and Market flowers and also some lovely Dusty Attic chipboards and some resin and metal embellishments. At the end I added some Art stones and Mini art stones and some splatters with diluted white acrylic color for the finishing touch. I love the outcome and I hope you’ll like it too and it inspires you to create something beautiful on your own today. 

Here are 49 and Market products that I used for my today’s project:

– Serendipitous 12×12 collection pack,

– Vintage shades

– Ecru Blossoms flowers,

– Garden seeds

– Bluebell flowers,

– Archival board 6×6 – Memory captured,

– Archival board 6×6 – Timeless.

Thank you for taking time to stop by. I wish you some beautiful days ahead and see you soon with some more inspiration.

Enjoy your day! Hugs, Aleksandra

“Seek and Wander” mixed media Canvas for 49 and Market

Hello dear crafty friends. I’m back again with some inspiration for you with gorgeous 49 and Market products. 
This time I decided to go more mixed media and just play a bit and enjoy the proccess. I’ve had a pack of these gorgeous Layered embellishments from Sand & Sea collection still. I love them to bits! These layered embellishments are one of the most beautiful products I have ever seen, so if you haven’t tried them out yet, be sure to do so. As it fits to them I decided to make an underwater mixed media canvas. 

First I tear appart a paper from Island Paradise collection and attached it to my canvas. Then I covered my canvas with a coat of clear gesso. I applied some Impasto acrylic paints in shades of mint and azure blue with a brush and wiped it partlly off. Then I added some stenciling with texture pastes and added some more intense colors on top with Lindy’s gang sprays. When dry I started aranging the composition. I used some gorgeous flowers and some Layered embellishments and also some cut-outs from Island Paradise paper collection. For the finishing touch I added some blue and white splashes with diluted acrylic paint and some quotes – Seek, Wander and Adventure awaits. 
Here are some detailed photos for you:

What about you? Some special adventures waiting for you still this summer? I hope you had a lot of fun till now and some still coming your way. We still have some short holidays planned with our kids before the school starts, so plenty of time for the adventures still.  

Here are 49 and Market products that I used for my today’s project:

– Sand & Sea Layered Embellishment set,
– Island Paradise collection
– “Under the Ocean” paper,
– “Wildflowers – Cobalt”,
– “Vintage Shades Botanical Blends
– Blue” flowers, – “Vintage Shades Cluster
– Blue” flowers,
– “Vintage Shades Potpourri
– Blue” flowers.

Thank you for taking time and stopping by. I wish to you some beautiful days ahead and see you soon with some more inspiration.

Enjoy your day! Hugs, Aleksandra

Ice cream summer fun with Lindy’s gang and Woodouts

Hello dear crafty friends. I was away for some time now due to some serious health issues, but I’m so so happy and excited to be back with you to share with you my creations made with gorgeous Lindy’s gang products and maybe inspire you along the way.

Summer with kids is always about a lot of water, sun, fun and of course… ice cream. The last one can not be missing. I’m just trying to tell my kids that they realy don’t have to have it each single day. 🙂 I’m not succeding at the moment! 🙂 So when I got this gorgeous ice cream Woodouts base in my hands I knew I had to make something beautiful with it. And of course Lindy’s are perfect to alter it into a beautiful piece of art.

I first covered my ice cream base with a coat of white gesso. When dry I applied some texture paste. I added Finnabair Gold Crackle texture paste on the bottom part with the cone and I made some notches into it with a tool to create a cone-like texture on it. I then sprinkled some embossing powder “Gilded Burgundy Brass” on top. I waited a bit till the crackle paste dried a bit on air, because when heating it with a tool, crackles are not so stressed. Then I heated it with hot gun to melt the embossing powder. On the upper part with ice cream I added some Finnabair Light texture paste and applied it with dabbing with my brush to create a look of the ice cream. 
I colored the bottom part using several Lindy’s sprays going from lighter to darker shades – Steampunk Sepia, Gossamer Gold, Incadescent Copper as well as two shades of Squirts – Maple Syrup Bronze and Beaver Tail Brown. I colored the upper part with several pink shades – Chateau Rose, Cotton Candy Pink, Pink Ladies Pink, Raspberry Lemonade and used few different embossing powders on top before heating with a heat gun – Raspberry Lemonade, Cosmic Pink Blue and a bit of Hi Maintenance Magenta. 
I added some dry gesso on top and emphasized the lines on the cone a bit with white acrylic paint. I also distressed the edges of a cone a bit with a dark brown color. 
After the mixed media part was finished I added some paper cut-outs, some beautiful paper flowers and resin embellishments. To finish my piece off I added some art stones and few white splashes with diluted white acrylic paint.

Here are some detailed photos for you:

I’ve also prepared a video tutorial for you on Lindy’s gang Youtube channel to follow along if you wish to:

You can find Lindy’s products I used for my project in their online store:

Hope you liked the inspiration that I prepared for you today! Thank you for stopping by. Enjoy your summer days and see you again soon!

Hugs, Aleksandra

“Use your wings, dream, Inspire” Altered box for Dusty Attic

Hello my dear crafty friends. It’s been some time since my last post. I’ve had some health issues to take care off and I missed my creative hours so so much in the meantime. I’m so happy today to be back with you again, sharing my fresh inspiration with you. This time I have for you a gorgeous altered box made with the amazing Dusty Attic chipies and some gorgeous mixed media goodies. As soon as I saw the eye-catching July Moodboard over at Dusty Attic blog, my mind wondered to gorgeous Stamperia paper pad, designed by an amazing artist Antonis Tzanidakis – Mechanical Fantasy. It fitted perfectly to the Moodboard. So I decided to create a rusty Mechanical Fantasy box, using the amazing Finnabair supplies, some Mitform castings metal embellishments bought at Mixed Media Place store and of course the fabulous Dusty Attic chipboards. I hope you’ll like my today’s project.

I first glued down some Dusty Attic chipboards to my box and colored everything with black gesso. I then dry-brushed it over slightly with white gesso. I colored the box with Lindy’s gang Buccaneer Bay Blue Moon Shadow Mist and a bit of a Tainted Love Teal Starburst Spray. I then started adding some highlights with three different Finnabair Texture fantasy pastes –  Cool gray from Old Walls set, Taupe Rose from Anemone and Coral set and Dusty from Camouflage set. I then added some cut outs from Stamperia Mechanical Fantasy paper set and some other embellishments, mainly of course Dusty Attic chipboards

Here are the Dusty Attic chipboards I used:

– Metal Plates,
– Clockworks,
– Blueprint Word Pack,
– Crazy Stitching Small,
– Crazy Stitching Large,
– Industrial Globes.

Thank you for taking time and stopping by. I hope I inspired you to play with your gorgeous Dusty Attic chipies and I hope to see some of your beautiful creations.

Enjoy your days.

Hugs, Aleksandra

“Happy Summer moments” 49 and Market Coctail drink

Hi dear friends,
I don’t know about you, but I allready started dreaming about a warm, happy summer days. They are nearer each day and I’m realy realy looking forward to them. So my today’s project kind of reflects my summer mood.
I know you are used to see mostly layouts made with gorgeous 49 and Market products. I love to make layouts so much, but one of my biggest passions are also altered art and off the page projects. So today I decided to share something a bit different with you and prepare you one of my off the page projects. Here is my Summer Coctail drink!

I took an empty coconut shell and an used dessert plate. Using some mixed media techniques I altered and colored the plate and created inside for my coconut shell, so that it looks like a fresh coconut with coconut meat at the sides and with coctail drink in the middle. I then used gorgeous 49 and Market “Tropical Paradise” Laser Cut Sheet along with its Bonus sheet to get some gorgeous tropical images with which I embellished my Coctail drink. I also added some gorgeous 49 and Market flowers and some beautiful sea-themed chipboards.

I hope you liked my today’s project and I hope it brought some of that summer mood into your heart as well.

Products I used:

– “Tropical Paradise” Laser Cut Sheet and Bonus Sheet,
– “Stargazers – Petal Pink” flowers,
– “Stargazers – Sky Blue” flowers,
– “Stargazers – Lemon Drop” flowers,
– 6×6 Archival Board – “Never Stop exploring”,
– 6×6 Archival Board
– “Happy Moments”

Thank you for joining me and have a lovely day ahead!

Hugs, Aleksandra